This guide walks you through deploying your first Kubernetes cluster on CTO2B. You'll learn how to create your first environment and deploy a simple Hello World Python application. We will also explore CTO2B’s key features, like accessing your Kubernetes cluster via the Teleport CLI, how to clone an application, and create a database.
¶ Deployment instructions
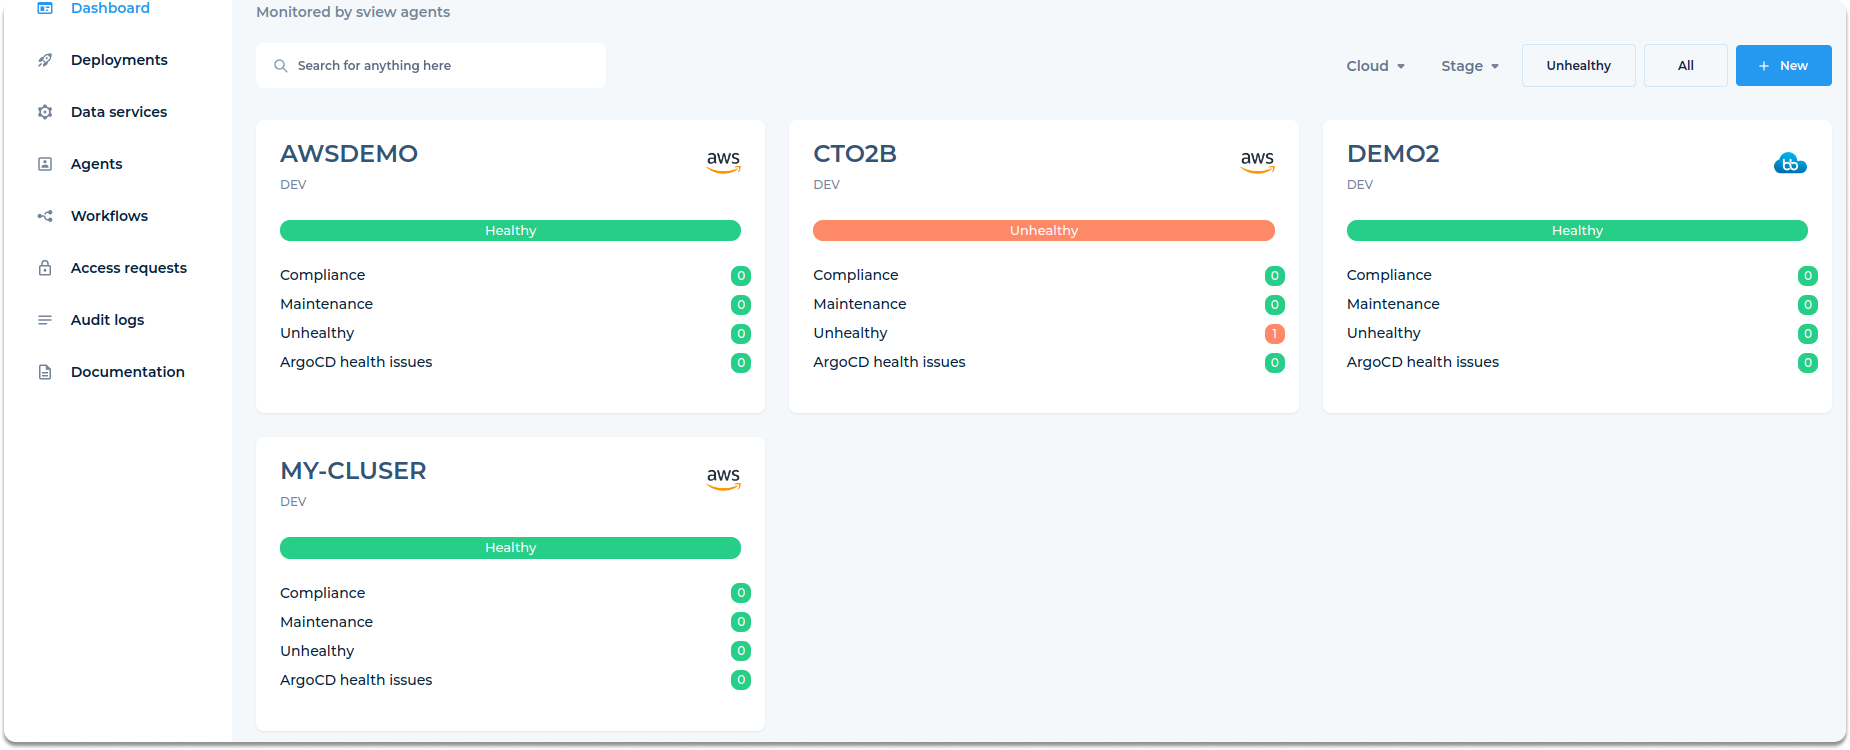
When you first log into CTO2B, the Environments dashboard is the main area you'll see. It lists all your Kubernetes environments that are monitored by Sview agents. Each environment shows its name, stage (such as dev or prod), and current health status, with clear indicators like "Healthy" or "Unhealthy." You can also track compliance, maintenance, and any ArgoCD health issues for each environment. The dashboard allows you to filter by cloud provider, stage, or focus specifically on unhealthy environments.
Step 1 - On the dashboard page, click New in the upper right corner to create your Kubernetes cluster.
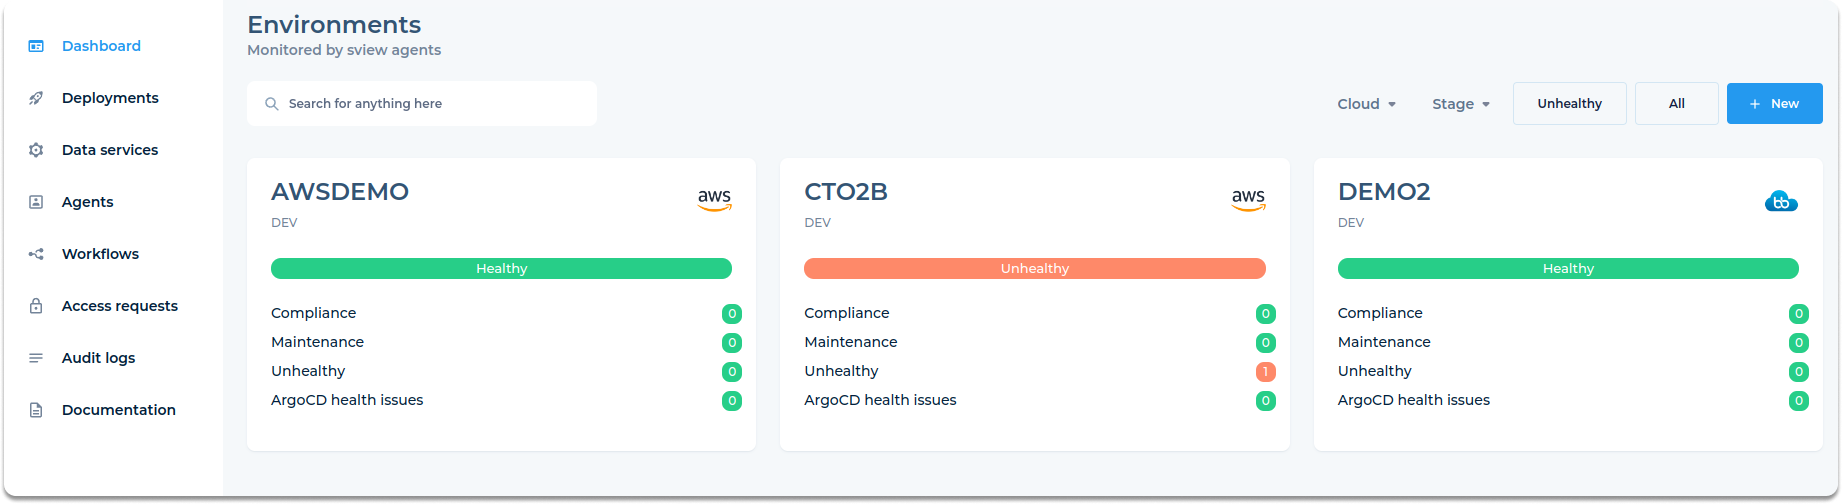
Caption: This is your CTO2B dashboard, where you manage Kubernetes environments, applications, and data services
Step 2—Select your preferred environment from the available options. Depending on where you want to deploy your Kubernetes cluster, you can choose from GCP, AWS or AZURE.
When you select a cloud provider, a pre-filled Helm configuration section with default settings will appear. These include storage size, networking configurations, and other variables based on the provider. Adjust the values as needed before proceeding. Explore the base deployment documentation for a detailed list of value options available for each cloud provider.
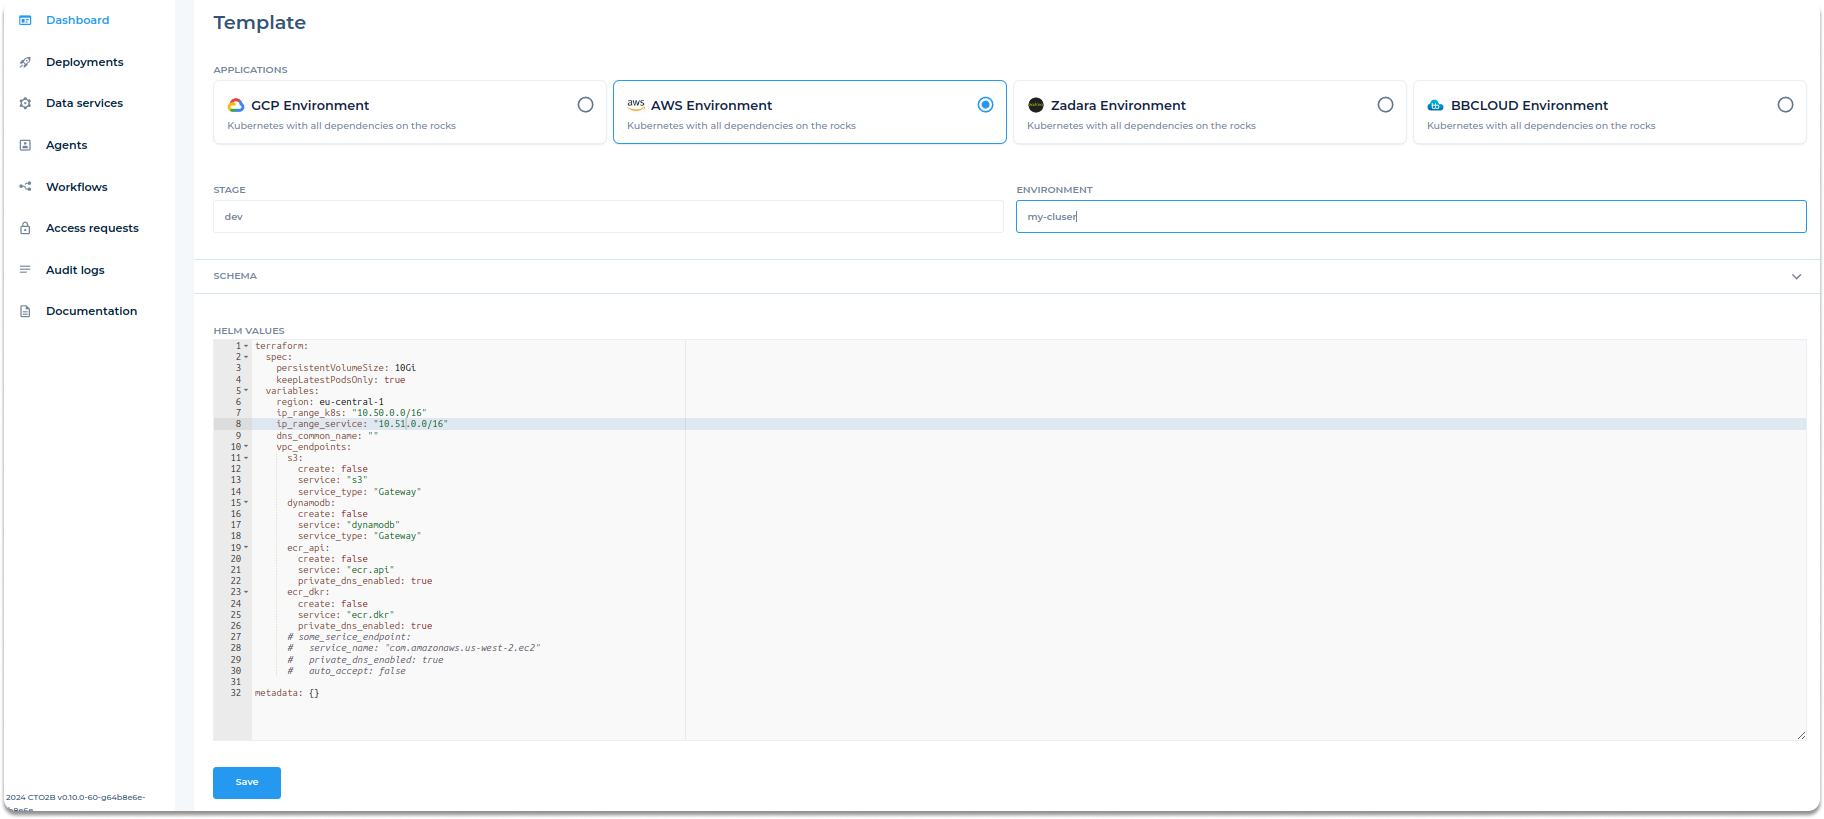
Caption: Here, we're setting up a Kubernetes cluster on AWS and customizing Helm values for networking and storage.
Step 3 - After selecting your environment, fill in the Stage and Environment fields:
- Stage: Define the stage of your deployment (e.g., dev, prod).
- Environment: Name your environment (e.g., demo).
Caption: Define the Stage and Environment names for your Kubernetes cluster.
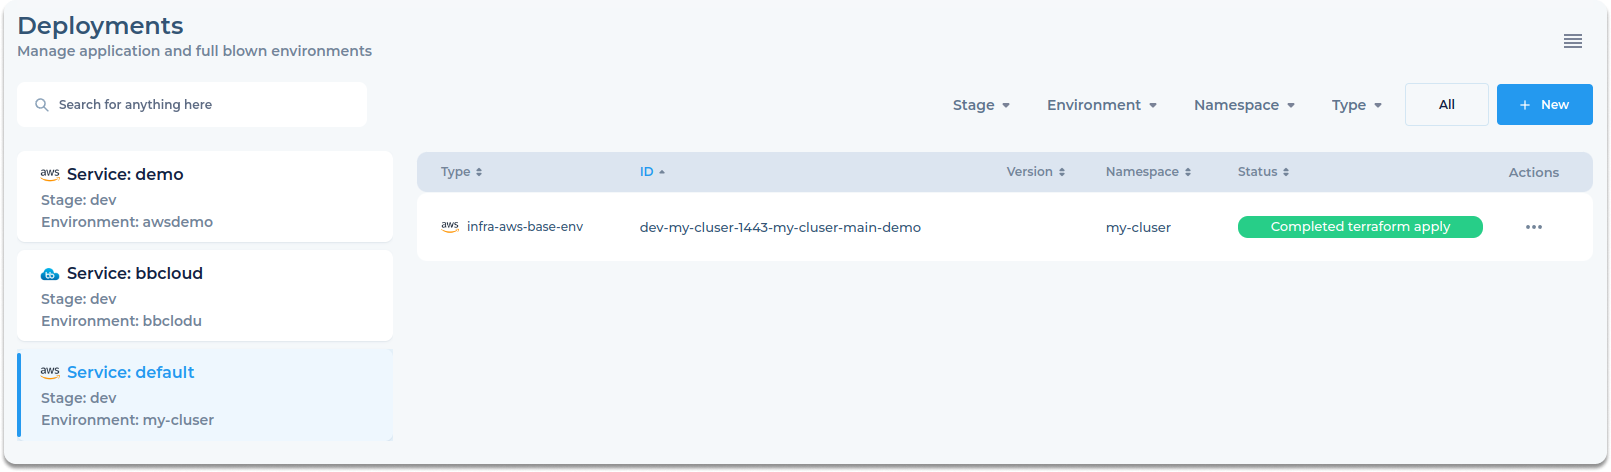
Step 4—After customizing the Helm values, click Save to create your cluster. Once you click save, the platform redirects you to the Deployments page. Here, you can see the newly created environment listed and its current status. In this case, the status shows as "Pending changes," indicating that the deployment process is in progress.
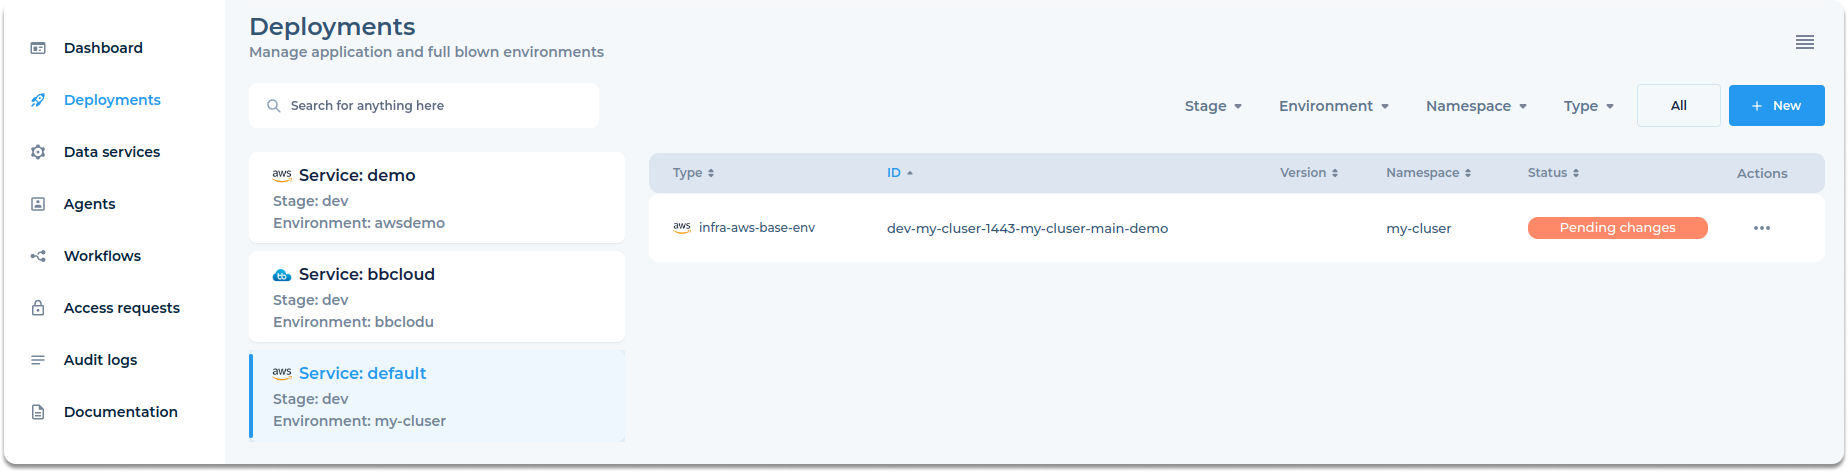
Caption: The environment is created and visible on the Deployments page with a status of "Pending changes."
When you click on the deployment entry, you are taken to a detailed view of the deployment process. This page provides information on the Helm repository, the namespace, and the chart path for the deployment. You can track the logs by clicking on the View Logs button to monitor the status of your Terraform plan.
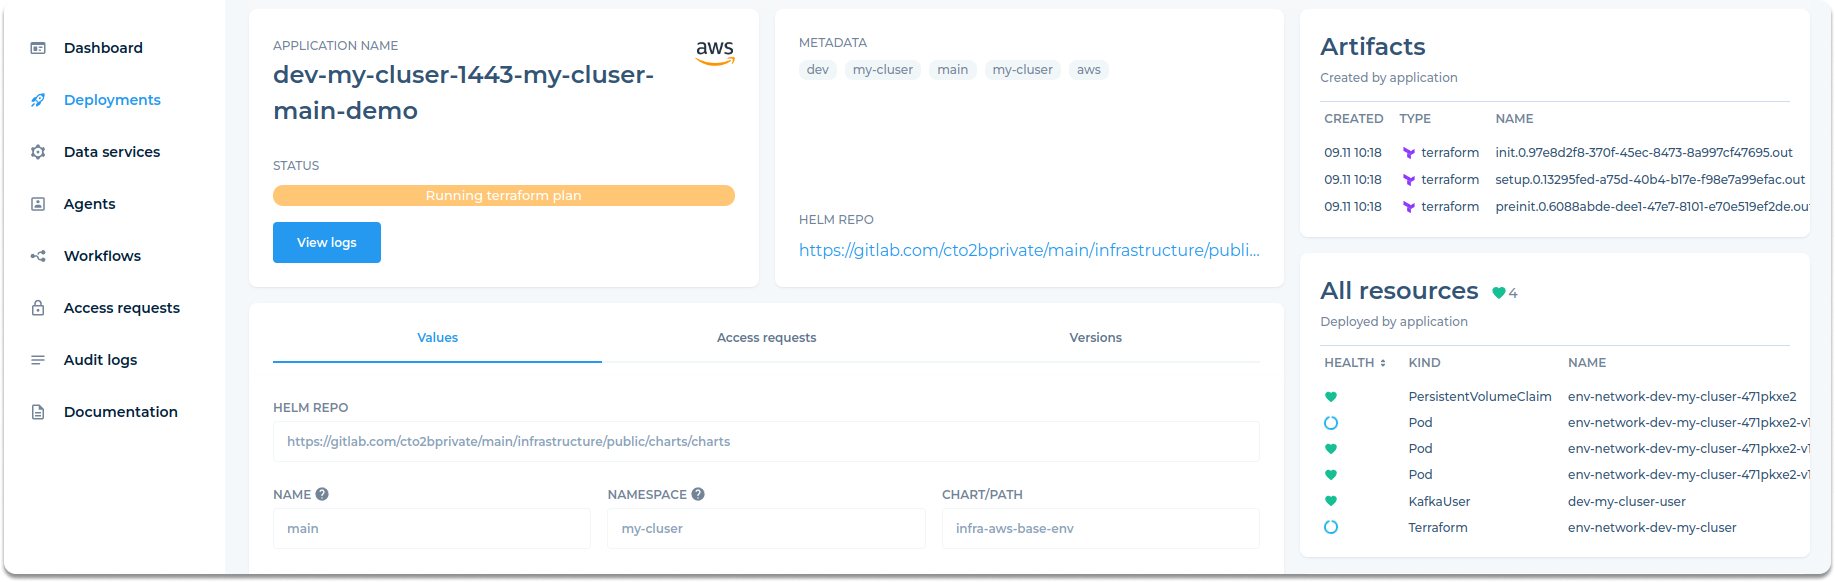
Caption: The deployment detail page shows the Terraform plan in progress.
After the deployment progresses, the page will show all the resources that have been created, such as Persistent Volume Claims, Pods, and other Kubernetes resources. The health status for each resource is displayed, and you can monitor the approval status for infrastructure changes. All the artifacts created during the deployment, such as Terraform logs, are also available for review. Environment creation can take up to 30 minutes.
Caption: Now the environment is ready
Step 5 - Once all resources are created, the environment will be listed in the Environments dashboard. Now, your environment is ready for use.